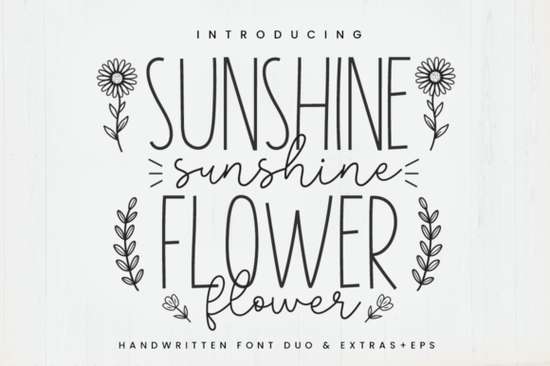
Finding the right typography for cheerful, everyday crafts can be tricky when you need both readability and a personal touch. The Sunshine Flower Font solves this by combining a tall sans serif with a lovely handwritten style. This duo gives crafters, print-on-demand sellers, and small business owners a versatile toolkit for creating everything from custom mugs to boutique clothing labels.
What makes this font pair work for crafting?
The core of this package relies on two distinct typefaces designed to complement each other. The tall sans serif provides excellent legibility, making it perfect for names, dates, and short phrases that need to be read from a distance. Meanwhile, the handwritten style adds a chic, approachable feel to your designs. Because they are built to work together, you can easily mix them in a single layout without the text looking disjointed. This is especially useful for print-on-demand sellers who need to create variations of a design quickly without switching between multiple software programs.
Beyond the standard alphabet, the package includes an extra doodles font and EPS vector graphics featuring sunshine and rainbow motifs. These bonus elements save you from having to draw or source additional illustrations, allowing you to quickly add playful graphics to your work.
How do these files work with cutting machines?
If you regularly use a Cricut or Silhouette machine, clean lines are essential. The tall sans serif is straightforward to weed, meaning you will not struggle with fragile, tiny serifs tearing during the peeling process. The handwritten duo is also optimized for crafting, with smooth curves that cut cleanly on vinyl and heat transfer material.
The included EPS vectors are particularly useful for sticker makers and apparel decorators. Since they are already in a vector format, you can scale the sunshine and rainbow graphics to any size without losing quality. You can easily layer these vector graphics behind your text to create a vibrant, multi-colored background that makes the main message pop. This is incredibly helpful when you need to resize a design from a small laptop sticker to a large tote bag graphic.
Which other styles pair well for different projects?
While a cheerful script and clean sans serif cover a lot of ground, you might occasionally need to mix in different aesthetics for specific client requests. If you are working on a more structured craft project, you might want to blend in a bold stencil style like the Afraty stencil option for a rugged, outdoorsy contrast.
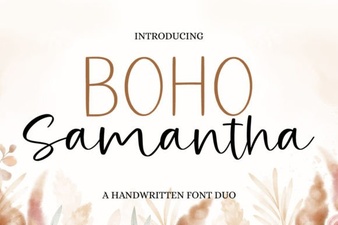
For elegant floral arrangements or boutique packaging, mixing your bright letters with a flowing style like the Samantha script family creates a beautiful visual balance. When designing modern apparel, a clean and stylish choice such as the Camila Ashton typeface keeps the overall look sophisticated and minimalist.
If your current craft is focused on bridal showers or invitations, pairing your cheerful graphics with a delicate rustic wedding lettering style softens the design beautifully. Finally, for children's clothing or playful nursery decor, adding a quirky touch with a bunny themed font makes the final product extra special for kids and parents alike.
What should you check before cutting your final design?
Before you send your design to your cutting machine or finalize your print-on-demand mockup, run through a quick quality check to ensure your materials and settings are aligned.
- Weld your script letters: If your software does not automatically connect the handwritten characters, manually weld them so the cutting blade treats the word as one continuous piece.
- Check line thickness: Ensure the thinnest parts of the handwritten font are thick enough to cut without tearing, especially if you are using standard adhesive vinyl.
- Test your weeding: Cut a small test patch on scrap material to see if the intricate curves of the doodles require a slower blade speed or deeper pressure.
- Flatten for print-then-cut: If you are making stickers using the rainbow and sunshine vectors, remember to flatten the design in your software so the machine prints the colors before cutting the outline.
Taking a few extra minutes to prepare your file will save you from wasting expensive vinyl and transfer tape. If you are new to making stickers, reviewing print-then-cut basics from the machine manufacturer can help you avoid calibration errors. Open your design software, load the tall sans serif for your main text, and start experimenting with the doodle elements to see how they transform your next craft project.
 Boho Samantha Font: Styles, Tips & Projects
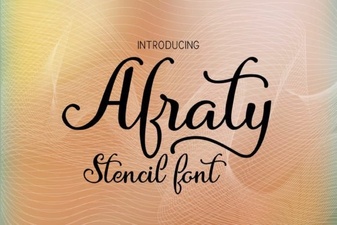 Afraty Stencil Font for Graphic Design Projects
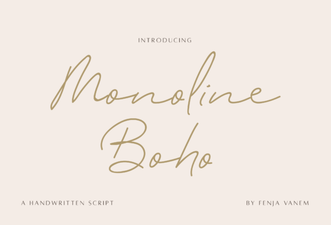 Design with Creative Monoline Boho Fonts
 Designing Beautiful Glowing Text Effects
 Modern Abcd Cursive Tracing Bundle Font Collection
 Sweet Baby Font: Design Tips & Download Links